 |
No need for go bars here. The notched center strip makes it impossible for the braces to shift around as Eli North closes the lid on the vacuum press. |
 |
In only a few minutes, the reduced air pressure causes the glue to set extra fast as the pressure outside the rubber gasket clamps the braces. |
 |
A bit of trimming at the end of the braces. |
 |
Lots of hand work at every stage keeps the woodworking neat and clean. He's cleaning some glue squeeze-out after removing the back from the vacuum press. |
 |
The back goes into a special fixture and a tiny hole is drilled for a locating pin. |
 |
This pin will key into the neck block to make sure the back is glued perfectly in place. Don't worry, the pin is set only halfway through the back so it won't show from the outside! |
 |
Sides get trimmed to dimension on a conventional shaper. |
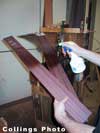 |
And squirted with water. |
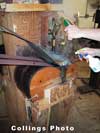 |
Strapped to the form along with an electrically heated "blanket" the sides bend easily to shape. |
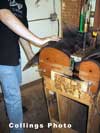 |
This is one of the oldest fixtures in the shop. |
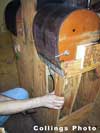 |
The sides are clamped and "over bent" just a bit so that when they are released from the bending form they will spring back to the right shape. |
 |
Here's a preview of the kind of bending form to come. . . |
 |
Now, comes the weirdest setup in the shop. Sides are put into an "inside mold" and clamped firmly in place. |
|
|
The mold fits onto this table. |
 |
Laying flat, the mold slides fore and aft on two tracks in the table. |
 |
Sliding forward, the mold encounters this incredible circular saw blade that rises out of the table. |
 |
The long lever below controls the rise and fall of the narrow kerf high speed saw blade. |
 |
Held tightly in the mold, both sides are trimmed precisely to length at the same time. |
 |
There's no particular need for this kind of precision because the joint will be completely covered by the neck or the end wedge inlay. No need, but then, no reason NOT to be precise either. Just typical Collings workmanship. |
 |
One more look at this nasty saw blade! |
 |
Now, the neck block gets a little key screwed to its base. |
 |
A bit of glue. |
 |
And the block slides perfectly into place. |
 |
A quick clamping of the neck and end blocks. |
 |
And the entire "hoop" can be removed from the mold, allowing for a continuous flow of work. |
 |
Back in a different mold, the sides are held as Theron Ball glues kerfed lining strips. |
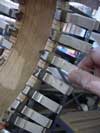 |
These are special clamps designed by Bob Taylor, a longtime friend of Bill Collings. |
 |
Check out that stalagmite of glue on the edge of the bench. |
 |
After years of gluing, the buildup is impressive. I wouldn't want to be the one to break this off by accident! |
 |
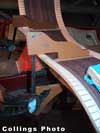
The classic shot. Seems like every photographer has to take at least one shop photo through a guitar mold. |
 |
The sides spend as much time as possible in this kind of mold to keep the shape constant. |
 |
Wooden side braces help keep the side rigid in case of impact or pressure. |
 |
Both the top and back are made with a "radius" form so that they are convex when the body is assembled. The round sandpaper covered plate is a concave "dish" used to sand the completed sides to a matching radius. There is a separate dish with a different radius for the top and back. |
 |
Simply holding the assembly on the rotating sandpaper dish is enough pressure to establish the shape. |
 |
The best part of this process is the tool itself. A standard electric potter's wheel is just the right speed and power for the job |
 |
And, you can do the job sitting down! |
 |
A simple Dremel router setup helps fit the top and back braces. |
 |
It's important to "inlet" the braces into the linings to avoid breakage in the event that the top or back gets leaned on or bumped. |
 |
Another little drill fixture. This one is for that index pin stuck in the back. |
 |
The pin in the back simply drops into this little hole, making it impossible to glue the back on out of alignment. |