 |
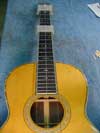
This is my version of a fixture I saw on a recent visit to C. Fox Guitars in Healdsburg. It's a remarkably clever self-centering alignment gauge for guitar necks.
Here's the Fox version.
|
 |
The basic idea is to have a straightedge with parallel edges, along which a pair of grippers slide up the neck to grip the tapered fingerboard. |
 |
The exact dimensions aren't particularly critical, as long as the sliders grip the straightedge without any play, and the pads are aligned to the centerline. The straightedge needs to be somewhat wider than the widest part of the fingerboard, so the sliders will overhang and stay in place. |
|

|
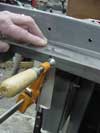
Simple as it seemed, I found the first step to be the most difficult. I cut a 40-inch piece of acrylic sheet about 2-1/4" wide on my table saw. If you haven't cut this stuff with a regular wood cutting blade, you've missed a treat of chips and other nasty wanderings. I managed to get a pretty good parallel cut by cutting about 1/8" oversize, and slowly trimming with successive cuts to the final dimension. |
|

|
A few strokes on some sandpaper held on the table provided enough smoothing, and allowed me to straighten the edge a bit more. |
|

|
For my little sliders, I chose some 1/2" thick acrylic sheet. I simply started cutting a wide groove in the center by making a pass over the blade, and reversing the piece, then adjusting the cut about 3/32" at a time to widen the cut. |
|

|
As I got near the final width, I made very tiny adjustments in the cut, until I had a block that slid very neatly over my long strip. |
|

|
I was able to slice sections on the band saw so I had four separate sliders. |
|

|
Here are a couple of them on the long strip. |
|

|
Now, the overhanging grips took me a little while to figure out, but I ended up making these little "L" cross section strips to cut pieces for the sliders. |
|

|
Some of that ubiquitous "Weld-On" did the trick to glue the little brackets in place. |
|

|
I started with the band saw to trim the grip areas. |
|

|
And filed a taper that roughly approximated the taper of the neck, allowing room for the 1/8" leather pads I'd be gluing in place later. |
|

|
Now, to keep everything running on center, I measured and compared the width of these little grip areas to make sure both sides were exactly the same thickness so that they'd be on center when they grip the fingerboard edges. |
|

|
A little rounding of the corners and buffing made the sliders look a bit better. |
|

|
Here's a cute trick I used for scribing a center line down the long strip. I ran my table saw fence over near where I had a scriber point clamped to the edge of the table. By scratching a line down the middle, and reversing the acrylic strip, I simultaneously widened the line a bit and made dead sure it was centered. |
|

|
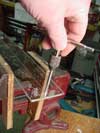
Here's the part I'm really proud of. Checkout my special French chef's scriber. . . |
|

|
I tapped a hole in each end to thread in a screw to act as a stop so the sliders wouldn't run off the ends. |
|

|
Cyanoacrylate worked well to glue the leather pads. |
|

|
Now, with the sliders on the long bar, I can simply slide them up the taper of the neck until they jam, forcing the bar to center itself on the tapered fingerboard. Here, the first slider jams at the 4th fret. I spent quite a bit of time working out the sizes and trying the sliders on a variety of necks, so that they would work well on either 1-11/16" to 1-13/16" nut widths. I'll have to use my leftover pieces to make sliders for wider necks. |
|

|
The upper one landed at about the 11th fret on this D-18. It has a nut width of 1-11/16". |
|

|
It's easy to check the centerline as it runs down the fingerboard, but it really isn't necessary. The sliders force the long clear strip tightly on center. |
 |
On this Collings guitar with its 1-3/4" nut, the sliders grip a couple of frets lower. If you look closely at the top photo, you'll see that one slider is barely gripping the 1-7/8" nut on that 1929 Martin 000-45. Even though the straightedge is held up off the fingerboard at that end, the centerline is held firmly. |
|

|
I can judge the "string line" as I adjust the neck angle, saving a bit of fumbling with my usual straightedges. |
|

|
And, because the acrylic is flexible, I can easily locate a tailpiece on an archtop guitar. This was a bonus -- I made the gizmo really long because I happened to have a 40" piece of acrylic. After trying it on this L-5, I cut the acrylic to about 34", which should be long enough for most any instrument I'm likely to encounter. |


