
From the machine shop and salvage bin
Tuner Button Shaft Repair
© Frank Ford 2010; Photos
by FF
In particular, old mandolins can present quite a probem when it comes to finding suitable replacement tuners. At the beginning of the 20th Century, the mandolin was so immensely popular that literally hundreds of different tuners were used, with unique shaft length, spacing, post diameter and style. As a result of the lack of any real standardization, we generally can't count on using new tuners without doing serious reconstruction of the peghead - clearly not a desirable thing to do to a fine antique!
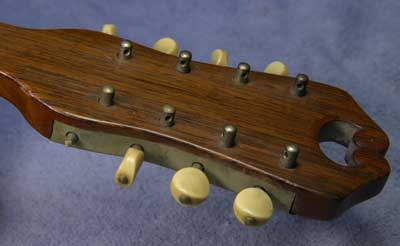
Here's today's bad news - a 100-year old Martin mandolin with a broken tuner button shaft:
And, the worse news is that the rest of the shaft and the button are missing:
After rummaging around my salvage parts drawers, I was able to come up with a button that was the same color, shape and size, broken from a different set of tuners. Note that the button was pressed onto the shaft, without the "through-hole" and rivet:
I removed the worm gear with the broken shaft, and found a lathe collet to fit, and turned most of the remaining stub of the shaft to reduce its diameter and true it up:
These tuners have a nickel plated finish on all the metal parts, and I wanted to retain that look, so I selected a piece of solid nickel sliver alloy to use as a shaft extension. I drilled a hole in the piece into which I could fit the reduced tuner shaft:
By using sold nickel alloy, I would be able to skip the trip to the plating shop, the consequent long wait and "minimum charge."
Then I joined the two parts by soft soldering them, much as one would "sweat" solder a copper pipe fitting:
Back on the lathe, I trued up the shaft and turned off the excess solder, finally polishing the shaft with some 1200 grit abrasive paper and a bit of metal polish:
After some judicious hand filing, I had a square section onto which I could mount the button, and a smaller diameter bit that would serve as the "rivet" to hold the button on just the same as the remaining original buttons:
To separate my salvage button from its shaft, I simply heated the shaft with my small soldering iron and pulled it out:
I wanted to drill out the button to the correct depth for my rivet section to poke through, so I used a drill bit of the same diameter as the shaft. In order to avoid drilling all the way through the button by mistake, I gripped the drill bit in the vise with just the right amount protruding. Then I screwed the button onto the drill bit by hand, neatly finishing the hole:
After this bit of drilling I used a small drill that matched the smaller diameter round end of the shaft to continue the hole all the way through the button.
It was necessary to reassemble the gear into unit in order to install the button, of course. I pressed the button onto the shaft with some medium viscosity cyanoacrylate to fill the spaces around the square section, and then tapped the shaft very lightlyseveral hundred times to form a nice rounded rivet head:
Back in gear, and looking good: